Don't Just Build UIs, Build Experiences


What happens when you use enterprise hardware and a modern software stack to make a toy smart? We found out.
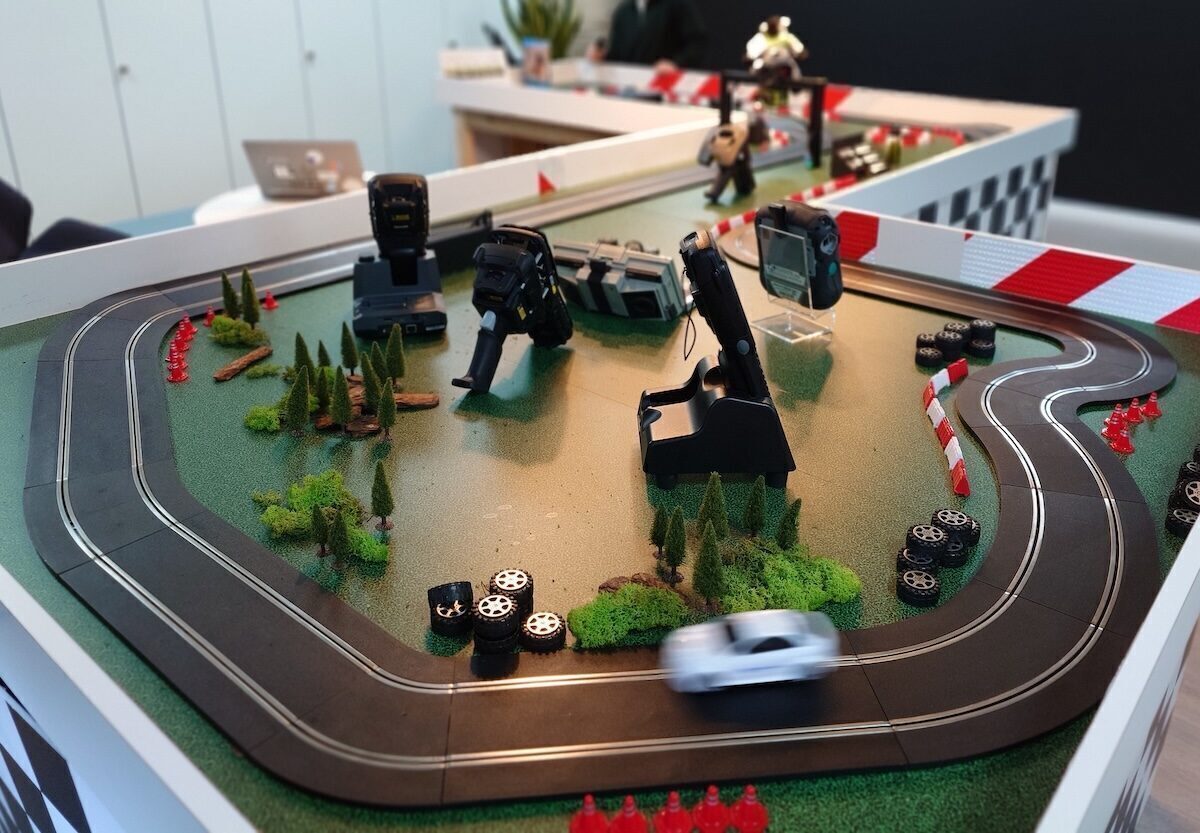
This project started with a simple idea - take a Scalextric track and connect it to some Zebra hardware to show off its capabilities. We went one step further and built a fully deployed experience - one that tracks every lap with millisecond precision, captures a photo as the car crosses the line, and creates a genuinely addictive game. Every technical decision had a player-facing reason. We weren't trying to make it work - we were trying to make it feel like something more.
This blog post is inspired by a talk we gave at Flutter Nantes - give it a watch!
The Challenge
The challenge of this project wasn't the software - our Dart and Flutter stack made development a breeze. The real challenge was making the real world our API. Cars flying around a flimsy plastic track covered in barcode stickers and RFID tags, zooming past cameras and antennas at full speed. These real-world events power the experience, the real work was designing a system that could take these messy physical inputs and turn them into reliable data.
The Stack
Hardware
- Zebra FX7500 RFID Reader and low profile antenna
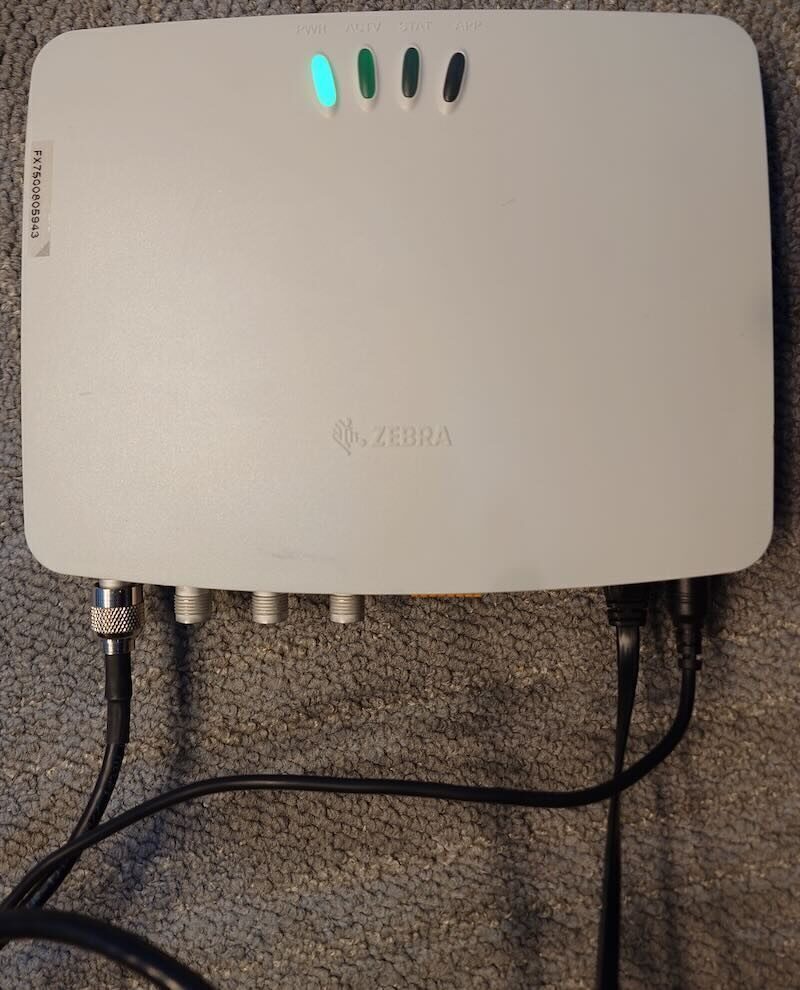
A fixed RFID reader with an antenna mounted in a bridge over the track. Each car carries a small RFID tag hidden under the bonnet. When it passes near the antenna, the reader fires an event to the server.
- Zebra FS40 Fixed Industrial Camera and light beam
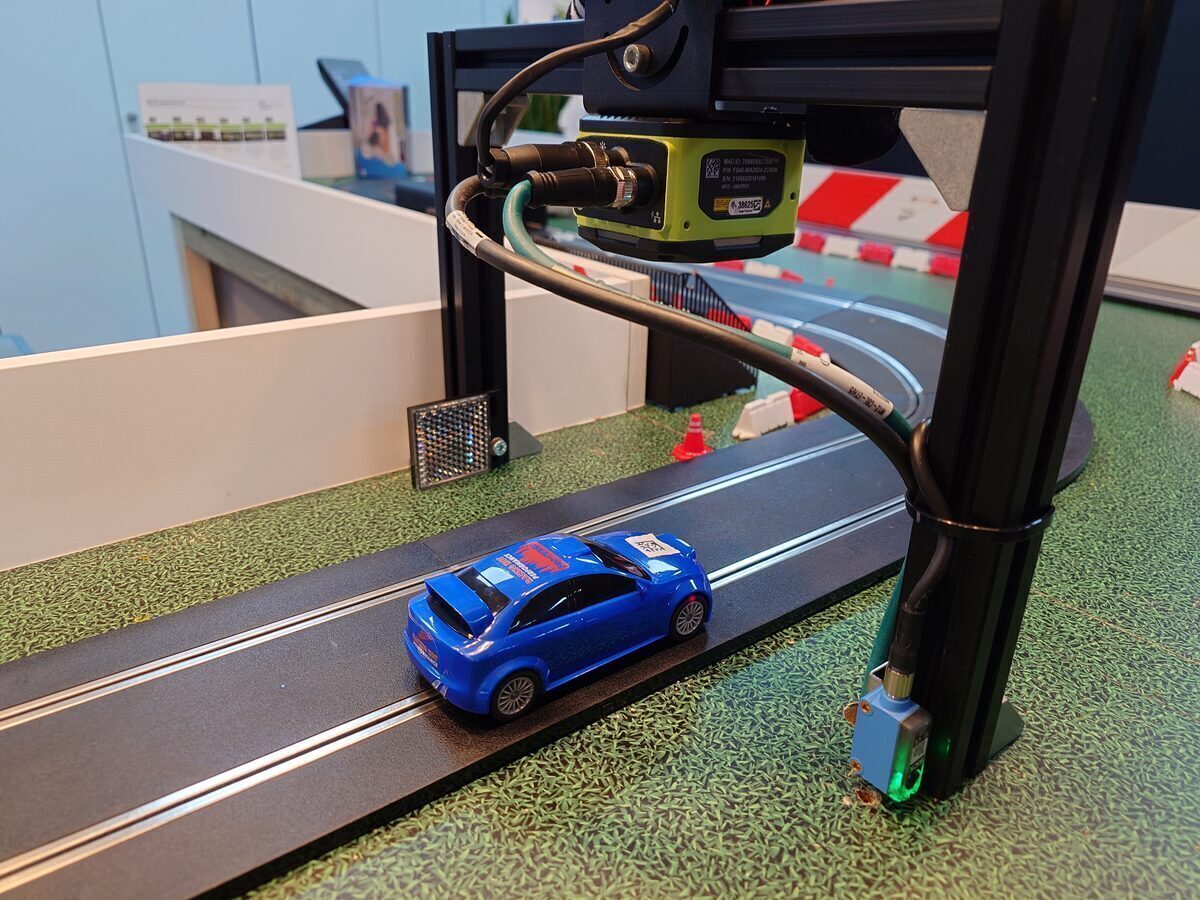
A machine vision camera at the finish line. When the light beam breaks, it waits to capture the exact moment the QR code is centred in frame, then sends the image to the server.
- Zebra KC50 Kiosk
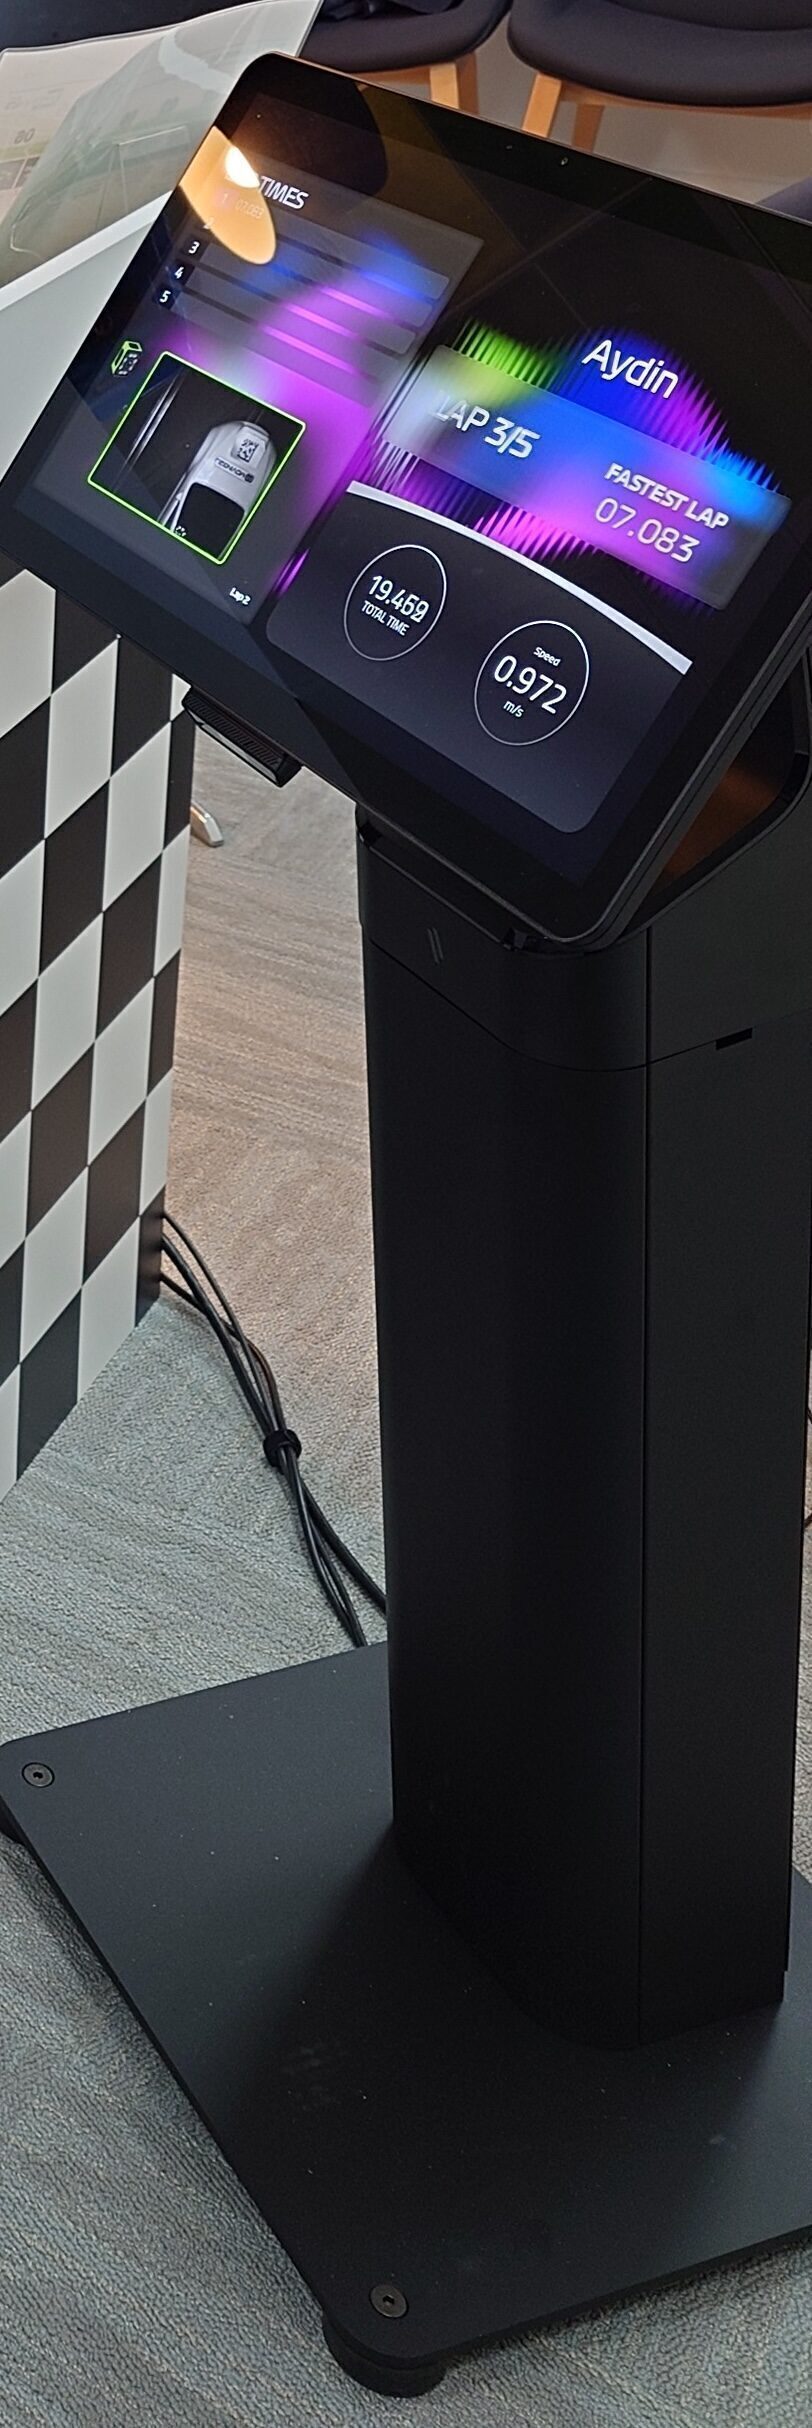
The large Android device that acts as the frontend for the game. Users scan in their details via the built-in barcode reader to start a game.
- Some old laptop
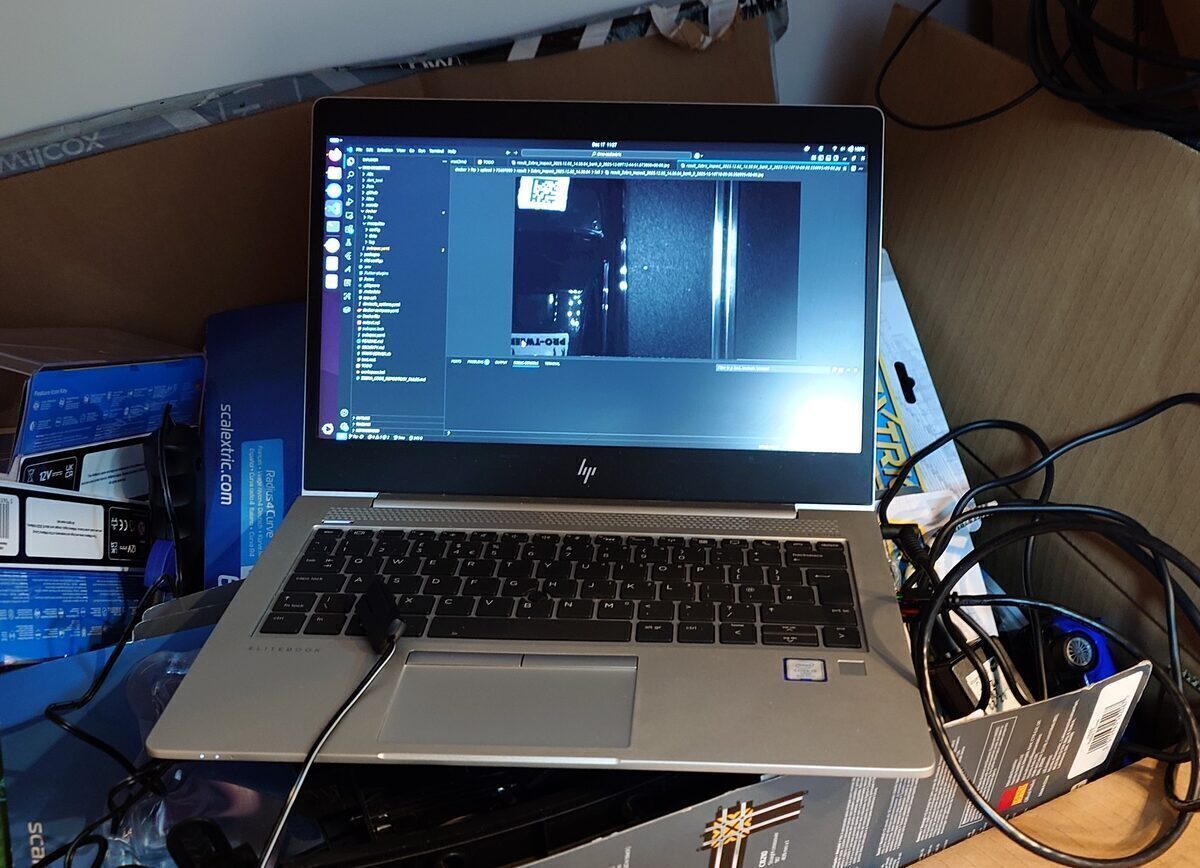
The roaring engine powering the Dart backend, hidden under the table. The hardware really isn't important.
All of these are connected over a local ethernet network with no internet access.
Software
- Dart backend
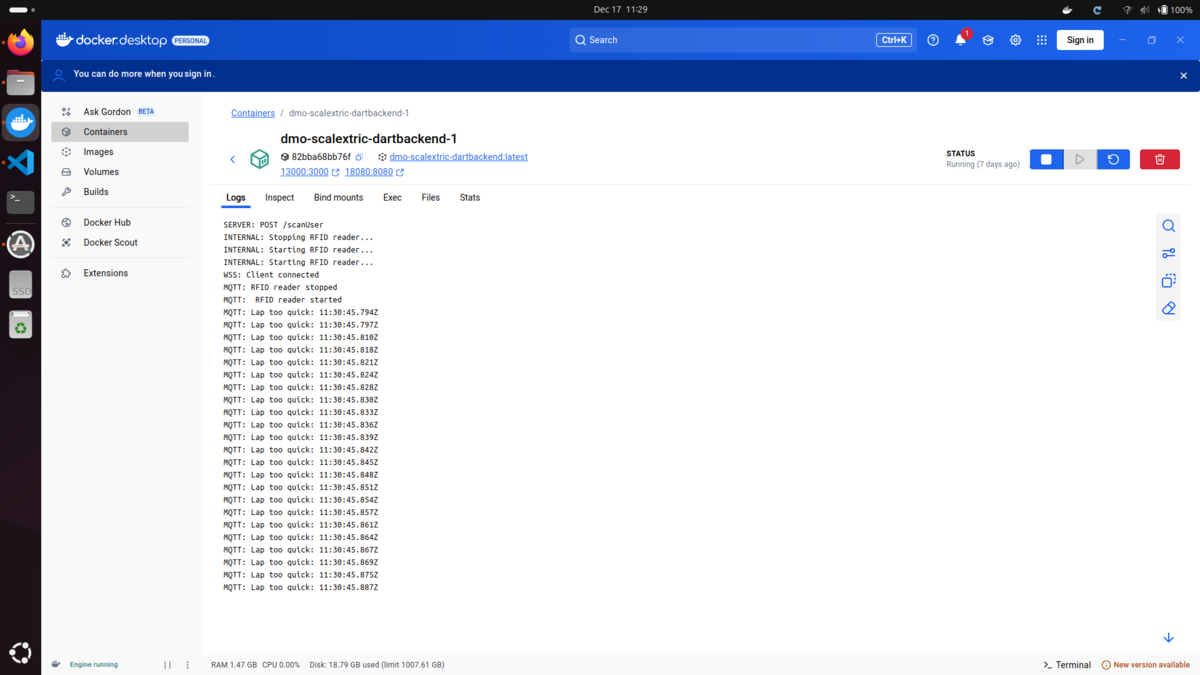
A Docker setup running containers for the Dart backend, an MQTT broker for RFID events, a PostgreSQL database for storing data, and an SFTP server for receiving images.
- Flutter frontend
Mirrored on both the KC50 kiosk and a TV, this app is the control centre for the entire game. Users log in, choose a game mode, and from there it handles car registration, live leaderboards, lap times, finish line photos, and game settings.
We wanted the architecture to be clean. Everything routes through the Dart backend - the Flutter app never interacts directly with the RFID reader or camera. This separation made it straightforward to mock parts of the system during testing and made the whole thing more reliable.
Gameplay
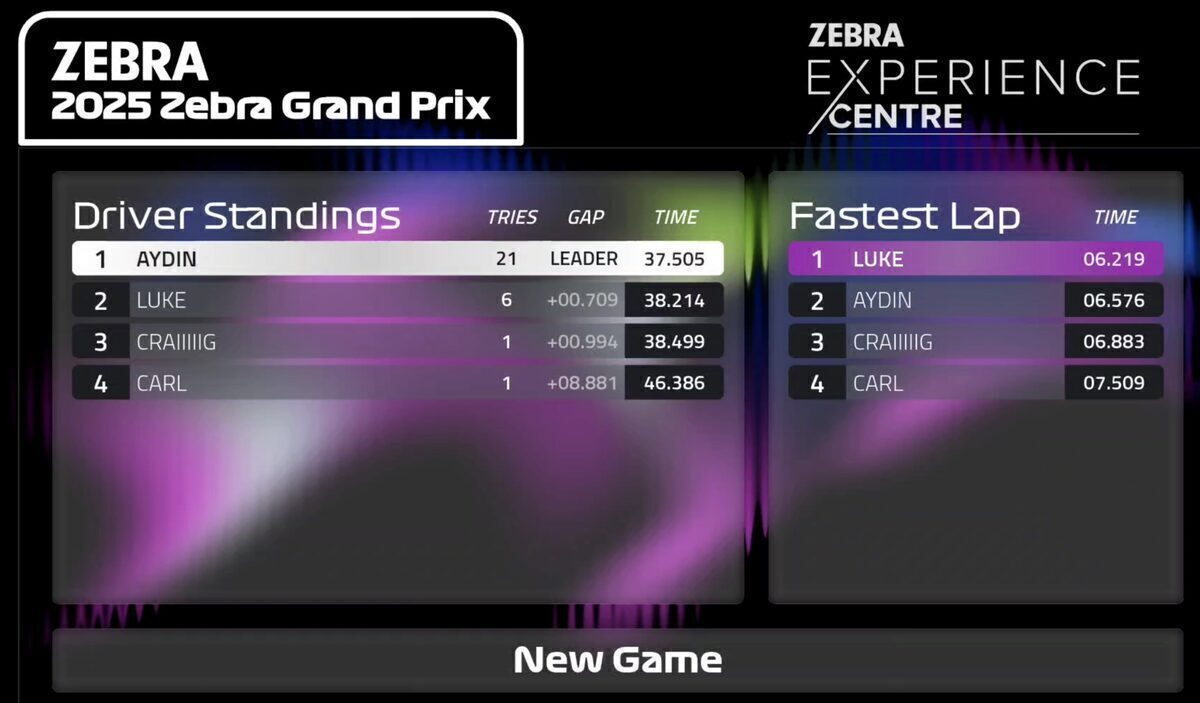
Players can choose between single-player qualifying or a two-player race. In both modes, lap times are saved to the database and shown on the leaderboard. There are two leaderboards: one for fastest single lap (à la Formula 1 qualifying), and one for overall time across a set number of laps. The second is the more meaningful one - a single clean lap is easy, but consistency over multiple laps separates the good drivers from the great.
Before either mode begins, players must register their car. This ties a specific RFID tag and QR code to a player, which ensures lap times are attributed to the correct player.
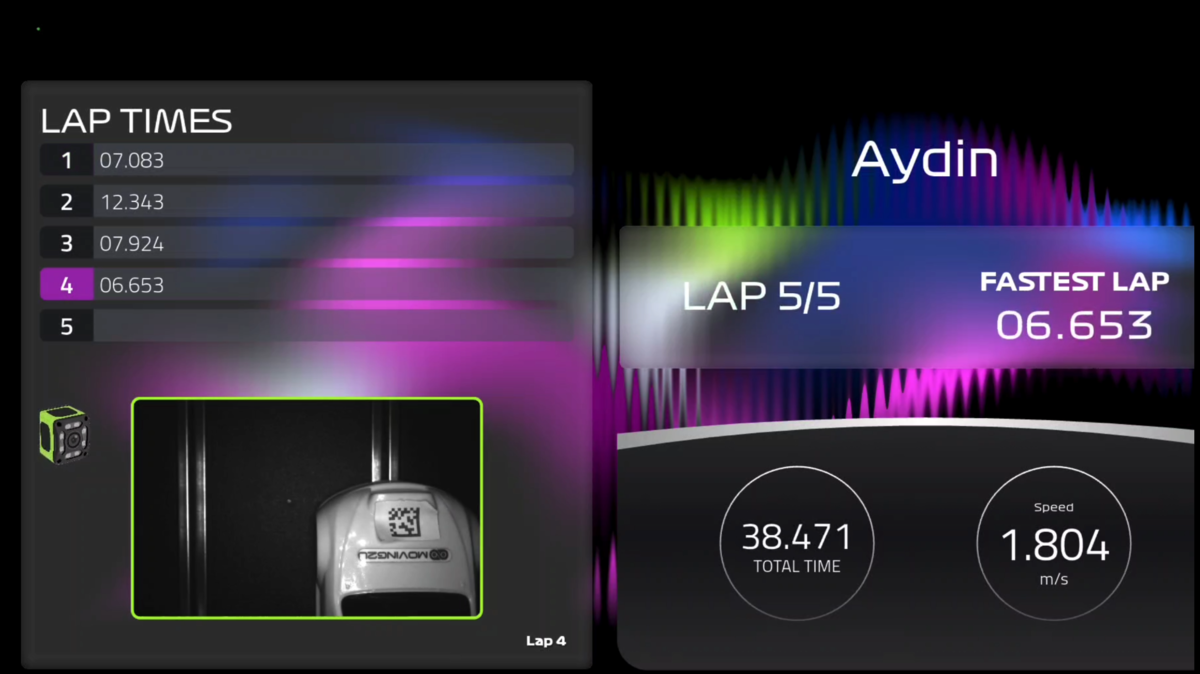
Qualifying - the player gets a practice lap or two, then goes straight into flying timed laps. Lap times, average speed, and finish line photos appear on screen in real time as they go.
Race mode - players line up behind the start/finish line, Formula 1 style. A countdown begins. If a car crosses the line before the lights go green, the first lap is invalidated and a jump start graphic appears on screen. From there, the system tracks lap times, average speeds, and finish line photos for each player across a set number of laps.
How a Lap Works
- Player logs in by scanning a badge or entering their details in the app
- Backend enables the RFID reader and camera
- Car crosses the start/finish line - RFID reader detects the tag and publishes over MQTT
- Simultaneously, the car breaks the light beam - camera scans for the QR code, saves the images to the server over SFTP, and lights up the gantry
- Dart backend validates the lap time, writes to the database, and broadcasts the update
- Flutter app displays the lap time and finish line photo
During gameplay, steps 3–6 happen in near real time. The lap time and photo are on screen milliseconds after the car crosses the line.
What We Learnt
The physical world makes for a messy API - which is exactly why enterprise-grade hardware makes all the difference. Calling a web endpoint gives you a response or an error. A toy car on a plastic track gives you duplicate reads, missed events, and the occasional crash. Building resilience into the system isn't optional; it's the job.
Our hub-and-spoke architecture helped a lot. Because every message went through the backend, we could debug components in isolation, fake events for testing, and swap things out without touching the rest of the system.
That's the engineering lesson. But the deeper one is simpler: getting the infrastructure right isn't the goal but a means to an end. It also proves that enterprise hardware doesn't have to be boring - an industrial RFID reader and a machine vision camera are what makes lap times flash green, or even purple (track record!), what gives you proof of that jump start, what makes the photo finish feel real. We didn't just build a UI, we built an experience.
For nerds - there will be a full technical breakdown of the hardware in part 2 and the software in part 3, but we have to finish writing them first!
Resources
- The project on GitHub: thelukewalton/scalextric-game
- Zebra Developer Docs: developer.zebra.com
- Zebra Open Source: github.com/zebradevs